How to use Runable 2.0 Agent

You open Runable. You type what you want built. The agent builds it.
That is the entire premise but there is a right way to use it. This guide covers exactly how, from your first message to shipping production work.
Just Tell It What You Want
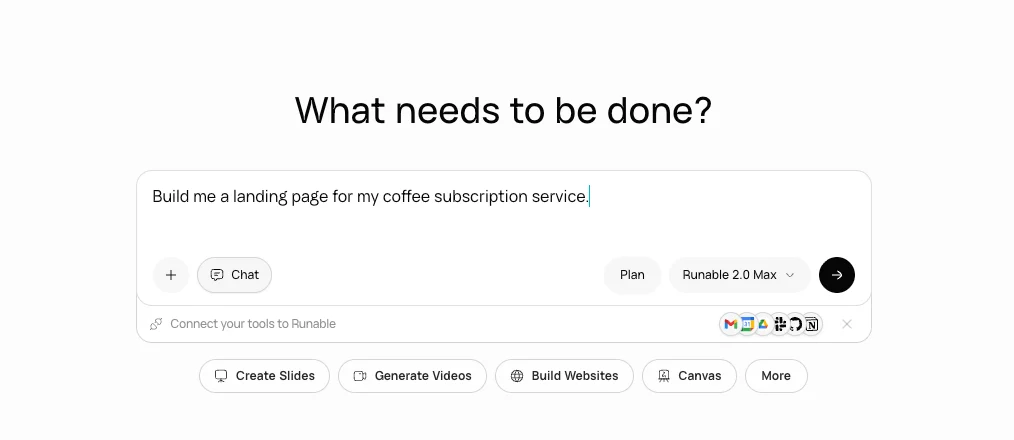
The input bar is where everything starts. Type what you need a website, a video, a pitch deck, a report, anything and hit send.
You do not need to be specific about how.
The agent reads your prompt, figures out what is missing , and asks you before it starts. It might ask what style you prefer, what audience you are targeting, how many pages or slides you want, or whether you need a specific integration.
You answer, it builds.
"Build me a landing page for my coffee subscription service."The agent might come back with
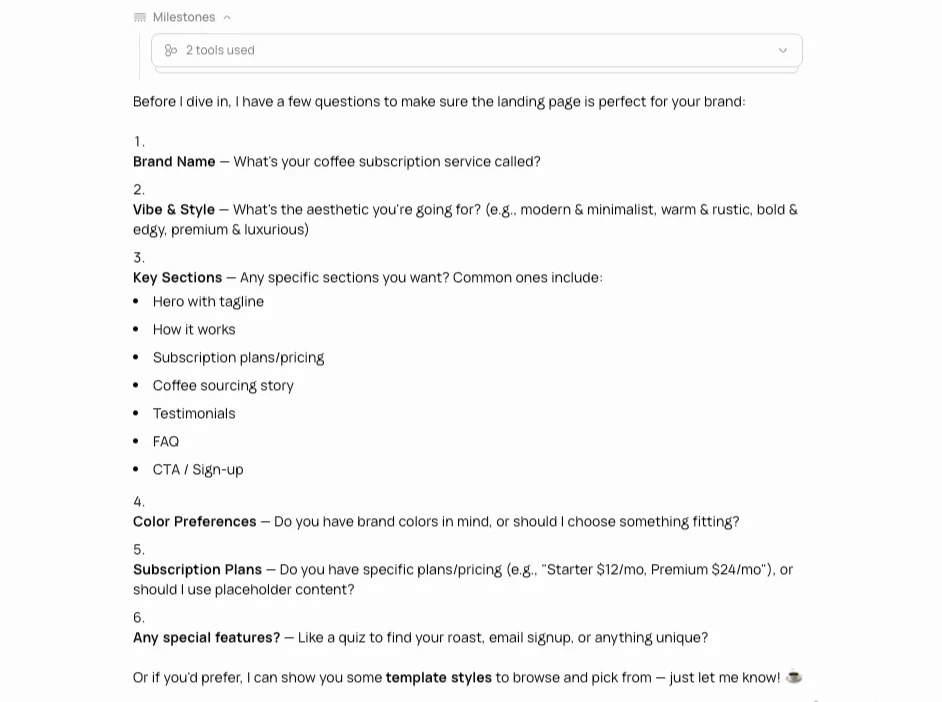
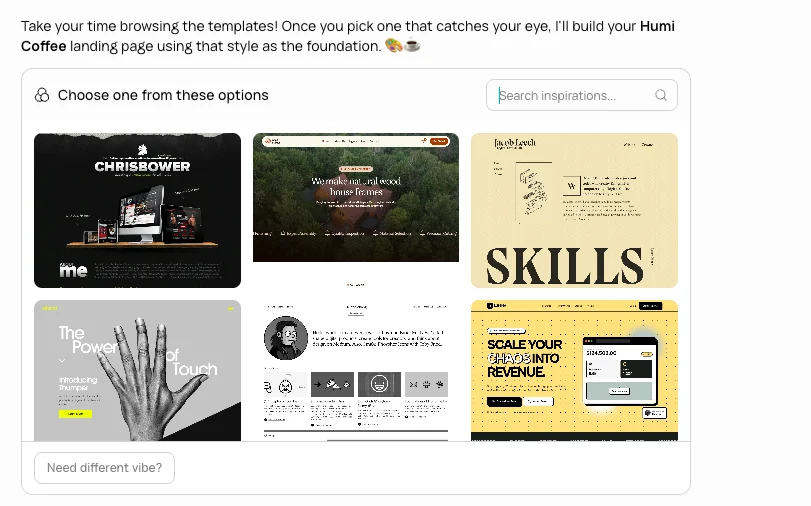
after answering all that, choose your preferred template
You answer. It builds.
You see the result live in the side panel. Then you keep talking to refine it.
That is the full loop: describe, answer, review, iterate .
The Input Bar
| Column 1 | Column 2 |
|---|---|
| Element | Description |
| Text area | Type your idea here |
| + button (left) | Attach files: images, PDFs, spreadsheets, videos, code, anything. The agent uses them as context |
| Chat button | Switches to Chat mode, which is research-only. It answers questions and analyzes files but does not build anything. The default view is the agent you are already in build mode |
| Plan button (right side) | Click this before sending a complex request. The agent will research, ask questions, and write a plan for your approval before it starts building |
| Model selector | Pick your model (like Runable 2.0 Max). Higher tiers give deeper reasoning for complex tasks; lighter ones are faster for simple edits |
| Connect your tools | Link Google, Slack, Notion, GitHub, Shopify, and 3,000+ other apps so the agent can work with your existing stack |
| Quick actions (below the input) | Shortcuts like Create Slides, Generate Videos, Build Websites, Canvas, and More. Tap one to start with a focused prompt |
Use Plan Mode When the Stakes Are High
you are about to ask the agent to build a 5-page website with Stripe checkout, a database, and user authentication. That is a lot of moving parts. You do not want it to sprint in the wrong direction.
Click Plan before you send that message.
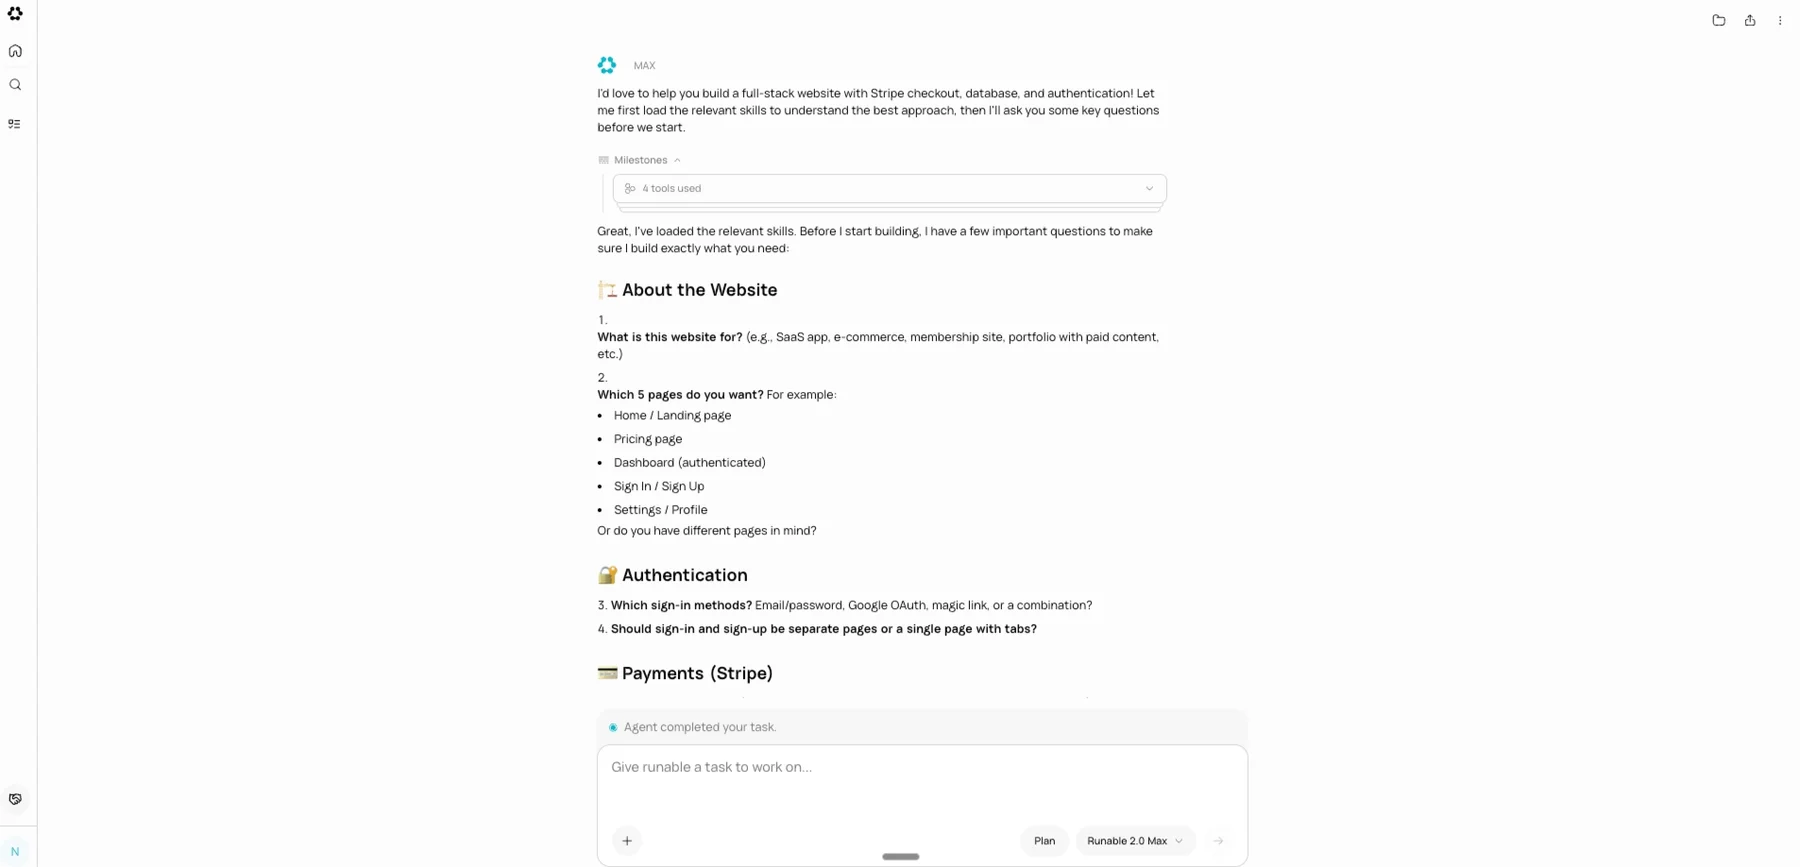
What happens next feels more like a strategy session than a build. The agent goes and does its homework - it searches the web for relevant patterns, reads through any files you have uploaded, checks its documentation.
Then it comes back to you, not with code, but with questions. Good questions.
Do you want users to sign up with email or Google ? Should payments be one-time or recurring ? Do you need an admin dashboard ? **
Once you have hashed that out together, it writes a plan a real, structured breakdown of what it is going to build, in what order, using what tools.
You read it. You tweak it. You approve it , Only then does it start writing code.
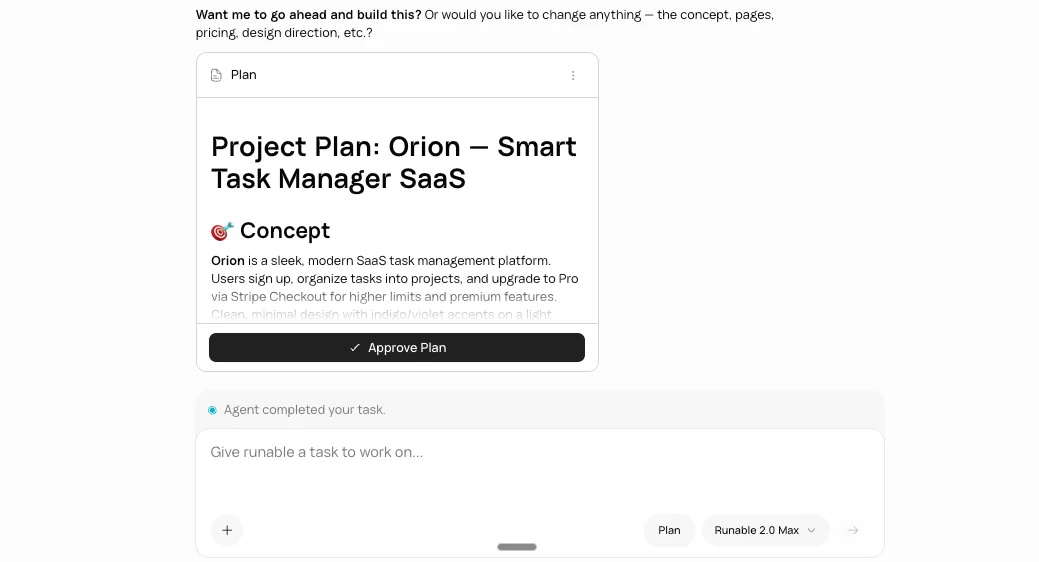
This is worth it every time the project has more than one or two pieces that need to work together. Multi-page websites, workflow automations, anything with integrations, Plan Mode saves you from the "that is not what I meant" moment three steps in.
Skills: The Agent's Specialized Modes
When you ask the agent to build something, it pulls up a
skill - a pre-built workflow with the right tools, templates, and steps for that job.
It picks automatically : ask for a pitch deck, it runs the presentation skill; ask for a landing page with Stripe, it layers the website and payments skills together.
Built-in skills cover the common stuff: websites, video, audio/podcasts, slide decks, research reports, spreadsheets, SEO, Stripe, analytics, and auth.
The more useful part for repeat users: you can build your own . If you're running the same type of task over and over - weekly client reports, custom content formats, whatever - package it into a skill once.
Creating skills inside Runable
Just ask the agent to build one. It creates the skill as a folder with a SKILL.md file, saves it to your sandbox, and it's immediately available for future conversations.
Ask → build → done, it's ready to use.
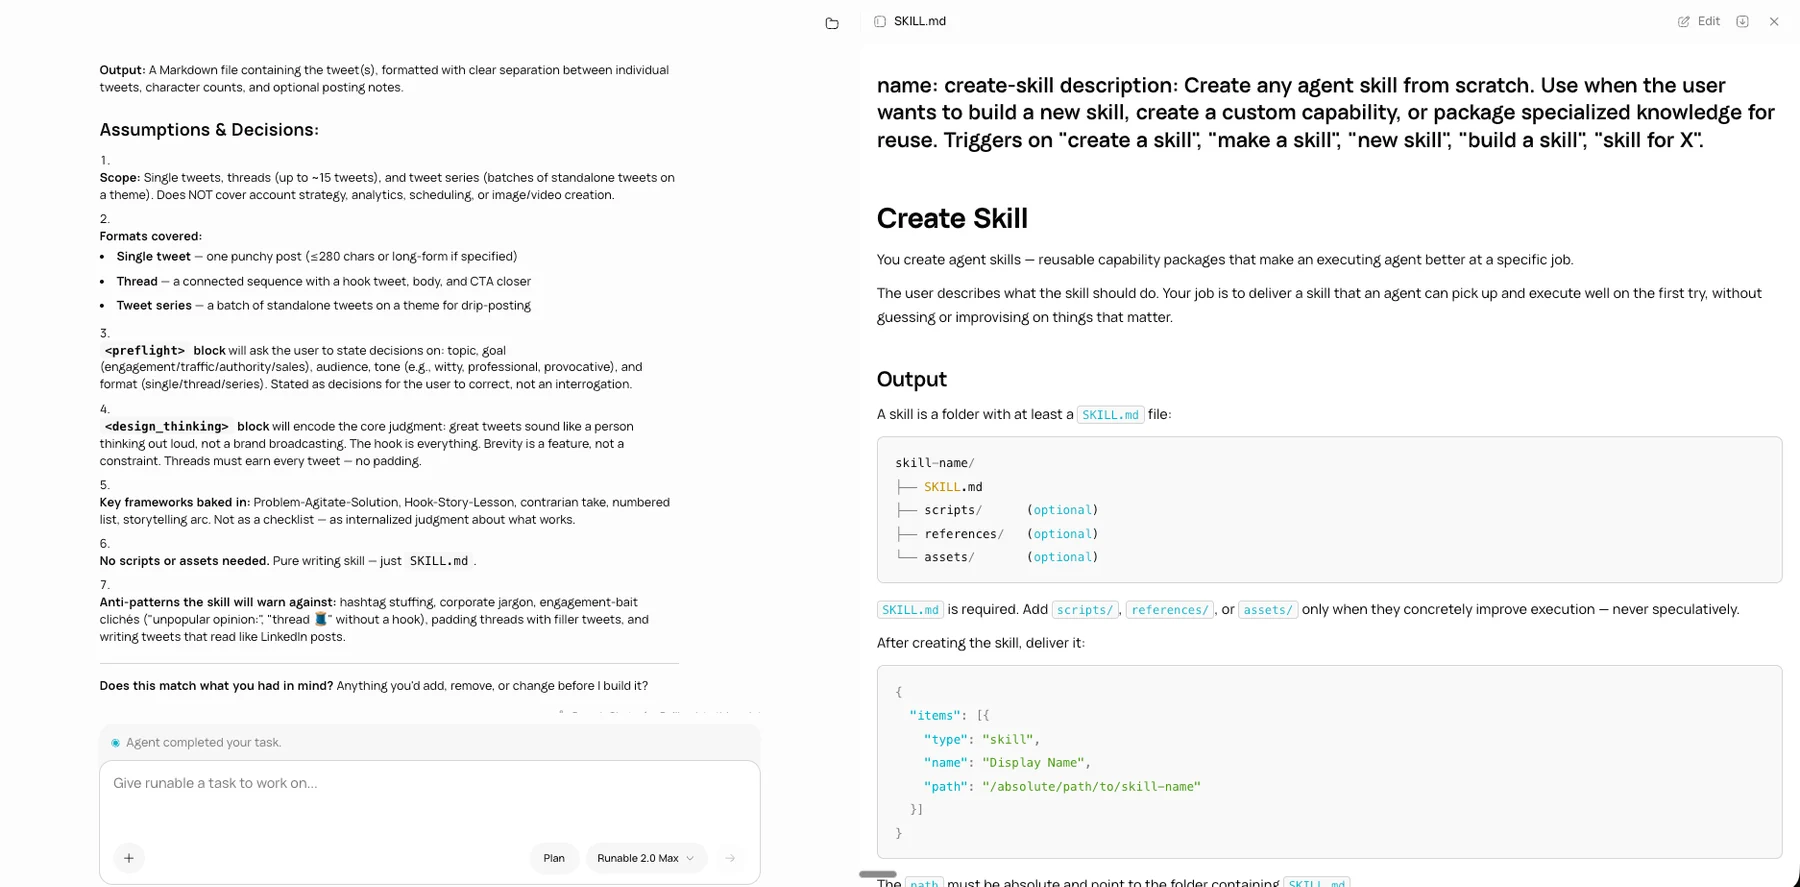
The agent follows your process without you re-explaining it every time. You can also just pick skills manually from the input bar if you want to be explicit.
Memory: Tell It Once, It Remembers Forever
Every time you start a new chat, the agent checks its memory first. If you've told it your preferences before, it already knows.
Say this once: " My brand colors are #1a1a2e and #e94560, font is Inter, always dark mode. "
Every design it builds from that point websites, decks, carousels starts from those defaults. No repeating yourself, no pasting style guides.
It works for anything you'd otherwise re-explain: company name, tone of voice, tech stack, deployment setup. Just tell it once.
Preferences change ? Tell it that too. " Switch to light mode from now on. " Done.
That Is It
No setup. No tutorials to watch. No configuration to fiddle with.
You type what needs to be done. The agent asks the right questions. You answer. It builds. You see the result. You refine it by talking.
Everything else the model, the tools, the code, the deployment, the file handling the agent figures out on its own. Your job is just to describe the outcome and guide the conversation.
That is how you use the Runable agent.